
What is Composting?
Composting converts organic waste materials into a nutrient-rich, soil amendment by bringing together the right ingredients in the right amounts to speed up the natural decomposition process. To put it simply, decomposition is natureâs way of recycling nutrients. By turning our food scraps and yard waste into compost, we can transform over one-third of our waste into a useful product. In ÐĄŧÆŅžĘÓÆĩ County, over 34% of household trash could be composted. Whatâs more, composting is an entirely scalable activity, and can be done on both a small scale in your own backyard or on a large scale at an industrial composting facility.
Why Compost?

Making compost and adding it to your garden will:
- Help plants grow bigger and healthier.
- Reduce the need to buy plant food and our reliance on artificial fertilizers.
- Help plants suppress plant diseases and pests naturally, reducing our dependence on chemicals.
- Help soil retain moisture and prevent erosion.
- Improve soil structure, making it easier to dig in.
- Reduce the amount of trash your household generates and sends to landfill.
- Reduce emissions from municipal landfills and lower your carbon footprint.
- Serve as a useful educational tool to teach children about natural resource conservation.
Backyard Composting: Getting Started
Backyard composting is an easy and cost-effective way to create your own plant food in your own yard. Many gardeners agree that a backyard compost system is an important part of a healthy garden. There are three main types of backyard compost systems:
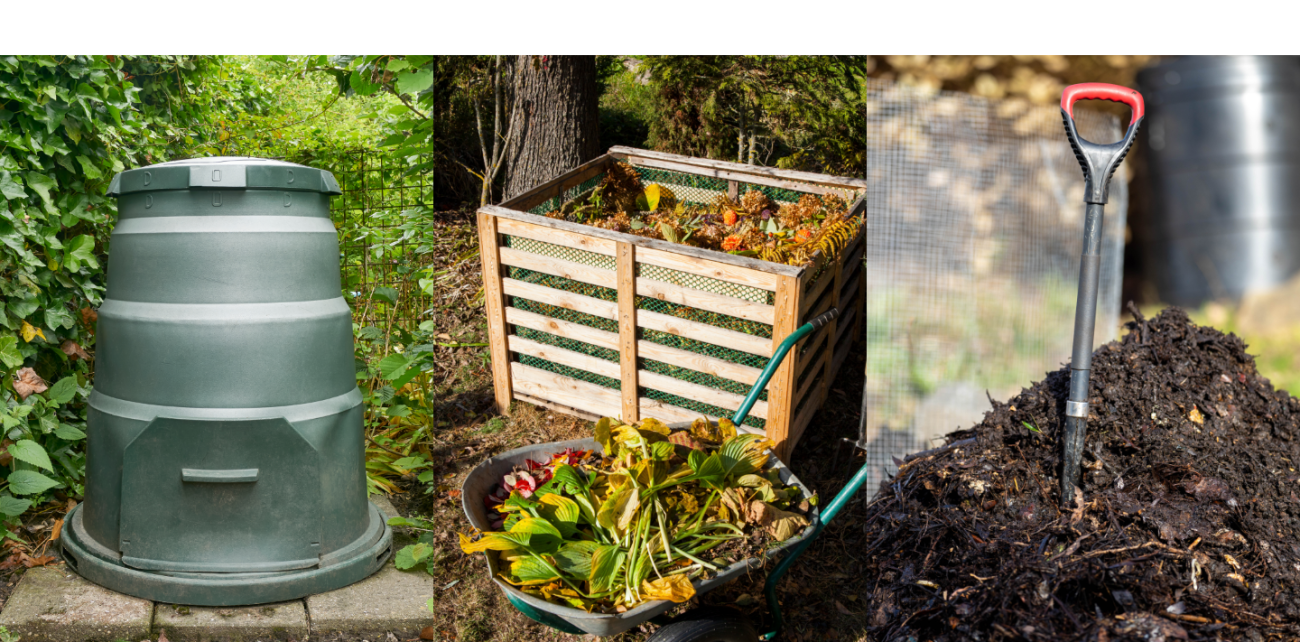
What Type of Compost System is Right for Me?
Manufactured Compost Bin
A manufactured compost bin is a good starting point, with features that allow for greater control over the process of composting and decomposition, which is more important if you are trying backyard composting for the first time or for those composting in an urban setting. They are contained systems that take up less space and are designed to be pest resistant. There are many different types of manufactured compost bins available at retail. Things to look for in a good, manufactured compost bin include:
- Made from a durable material to withstand weathering, and decay.
- A tight-fitting lid to prevent pests gaining access.
- Sufficient ventilation holes to allow air to flow through the bin.
- A conical shape to prevent compost getting stuck in corners.
- A harvest door for compost removal.
Drawbacks of a manufactured compost bin include:
- The amount of compost you can produce is limited to the size of the bin.
- Rain cannot get in, so you will have to add moisture if it gets dry.
- Water is one of four vital ingredients required in composting!
- The initial cost of buying the bin.
- Expect to pay anywhere between $30-$300 for a compost bin.
Tip: In an effort to reduce waste sent to landfill, municipalities sometimes offer discounted compost bins sales, where residents can purchase composters below retail value.
Do-It-Yourself (DIY), Homemade Compost Bin
A Do-It-Yourself (DIY), homemade compost bin is usually a less expensive alternative to a manufactured bin and can often yield more results because you can determine the size you need yourself. You will need an area between 3 cubic feet (to reach volume and desired temperatures in the middle) and 5 cubic feet (to keep the amount of mixing manageable).
Common materials used to construct DIY compost bins include trashcans, drums, concrete blocks, wooden pallets, etc. There are hundreds of DIY compost bin design ideas on . Search to find designs that will work best for you.
Drawbacks to DIY compost bins include:
Some designs fail to consider the right amount of ventilation needed to achieve the optimum rate of decomposition. Composting is an aerobic process. Oxygen is one of four vital ingredients required in composting! ~10% Oxygen level is required for composting.
- Too much ventilation (>15%) can lead to excess evaporation.
- Too little ventilation (<5%) can turn your pile anaerobic.
Open Pile
An open pile is the least expensive option and typically yields the most compost due to their larger size. You will need more space for an open pile, preferably an area between 4-5 cubic feet. Compost piles larger than 5 cubic feet can become unmanageable and difficult to aerate by hand. Open compost piles are better suited in rural areas, or on larger properties, further away from neighbors.
Drawbacks to open piles include:
- They will attract local wildlife.
- They lose moisture, especially in summer.
- Their large surface area allows moisture to evaporate.
Tip: You will often see open compost piles with a tarp over the top in summer to keep the moisture in and the deer out!

Where to Locate a Backyard Compost System?
After selecting the type of compost system to use in your backyard, you need to decide where to place it. The ordinance for ÐĄŧÆŅžĘÓÆĩ County states, âComposting activity shall not occur within 25 feet of any structure or used dwelling which is located on adjacent property.â This means your compost bin should remain 25 feet or more from your neighborâs house or shed. If you live within a municipality of ÐĄŧÆŅžĘÓÆĩ County, you will need to check your townâs ordinance on residential backyard composting. .
In addition, there are a few things to consider when deciding where to situate your compost bin or open pile:
On Bare Ground
Active compost systems produce moisture, and the moisture will drain, so it needs to be installed over a permeable surface, such as soil, grass or mulch. Compost systems that can drain directly into the ground also provide access for decomposers to enter and leave the system freely (as conditions fluctuate with seasonal variances). Decomposers (including bacteria, fungi, protozoa, and insects) are one of four vital ingredients required in composting!
Close By
Make throwing food scraps into your compost system convenient. Common mistakes include placing compost systems âout of sightâ, at the end of the yard because they are not aesthetic, but this can quickly become âout of mindâ and people stop using them because they either forget about them or they are not as conveniently located compared to the trashcan.
Tip: Place your compost bin near your trashcan to make walking to it just as convenient.
Proximity to Water
Your system should be within reach of a water source, a garden hose or watering can to maintain the right moisture level. If a compost system dries out, it will cease to break down and remain dormant. A properly maintained compost system should be damp at all times, similar to a wrung-out sponge, but never soggy. Too much water and the decomposers will drown.
Tip: Once full, put your kitchen scrap bucket under the faucet and top it up with water before emptying into the composter outside, and you will have fed and watered your compost system in one visit!
Away from Structures
Structures susceptible to rot should not be in contact with decomposing materials, so do not put your system up against a wooden fence or storage building.
Partial Shade
This helps to prevent excessive heat build-up, especially in plastic bins in warmer climates. If shade is not an option for you, pay closer attention to the moisture levels in your compost system, especially in summer.
Waste Materials Suitable for Backyard Composting
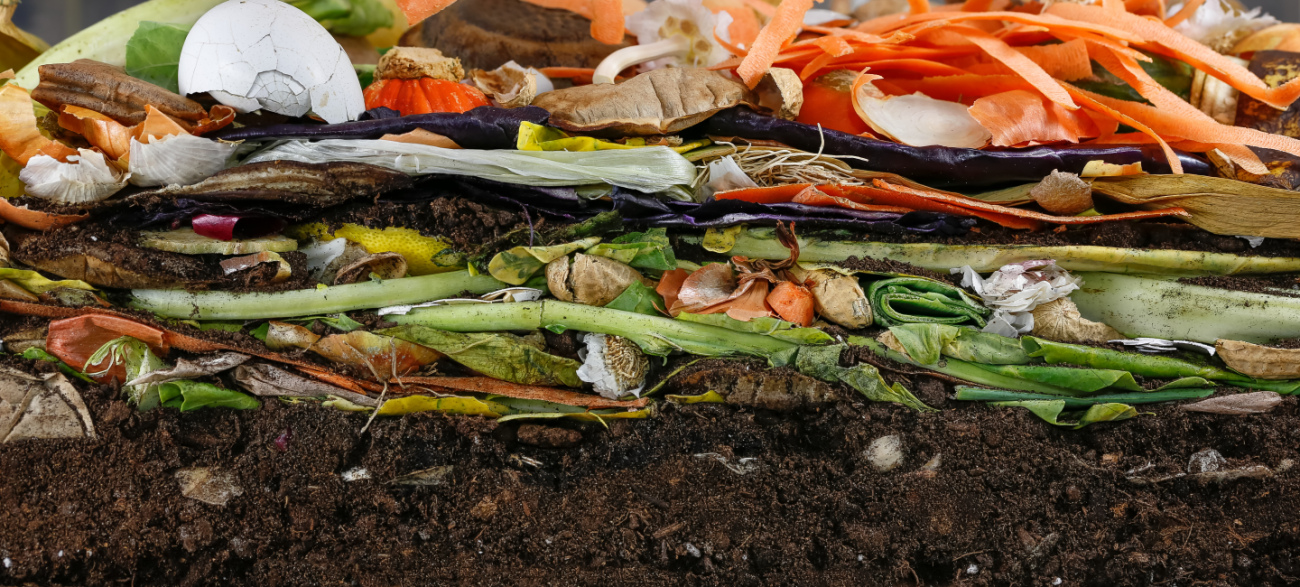
The fourth ingredient vital to composting is organic waste! We're not referring to food grown without chemicals, but to any waste materials that were once living. Organic waste materials suitable for composting are divided into two groups. They are referred to as "Browns" or "Greens".
"Browns" are typically brown in color, and include dead, dried-out materials, such as dead leaves, twigs, and straw. Browns are rich in Carbon. "Greens" are typically green in color, and include recently-cut, moist materials, such as fresh grass clippings, and fruit and vegetable scraps. Greens are rich in Nitrogen.
The Recipe
Carbon (C) and Nitrogen (N) are essential nutrients for decomposers. Carbon is used by decomposers for both energy and in cell structure. Nitrogen is used by decomposers for cell growth and function. Therefore, decomposers require more Carbon in their diet compared to Nitrogen. This can be achieved by maintaining a volume of 2:1, adding twice as much Carbon-rich materials or "browns" in your compost pile compared to Nitrogen-rich materials or "greens".
2 x Browns/Carbon (C) |
1 x Greens/Nitrogen (N) |

|
Leaves (not black walnut trees), and leaf mulch |
Fruits and vegetable scraps |
|
Twigs and plant stalks |
Shrub, bush and plant clippings |
|
Cardboard tubes and paper towel rolls |
Houseplant leaves |
|
Straw (not hay) |
Fresh grass clippings (in moderation) |
|
Shredded paper or newspaper (non-glossy) |
Coffee grounds, and paper filter |
|
Paper napkins and paper towels |
Tea leaves |
|
Pizza boxes |
Flowers and dead flower blossoms |
|
Paper pulp egg cartons and drink trays |
Freezer-burned fruits and vegetables |
|
Untreated sawdust, bark or wood chips |
Old, expired herbs |
|
Nut shells (not walnut, and in moderation) |
Beer hops and wine-making dregs |
|
Cotton balls/pads |
Aquarium or pond algae and plants |
|
Dryer lint (natural fibers) |
Seaweed |
|
Natural fibers (cotton, wool, linen, burlap and hemp) |
Herbivorous animal manure (rabbits, chickens, horses) |
|
Brown paper bags |
Drink dregs, coffee, tea, soda and juice |
|
Pencil shavings |
Weeds before they go to seed |
|
Paper baking cups |
Tea bags (with the string, not crimped) |
|
Bamboo skewers and toothpicks |
|
|
Herbivorous pet bedding (rabbits, chickens, etc.) |
|
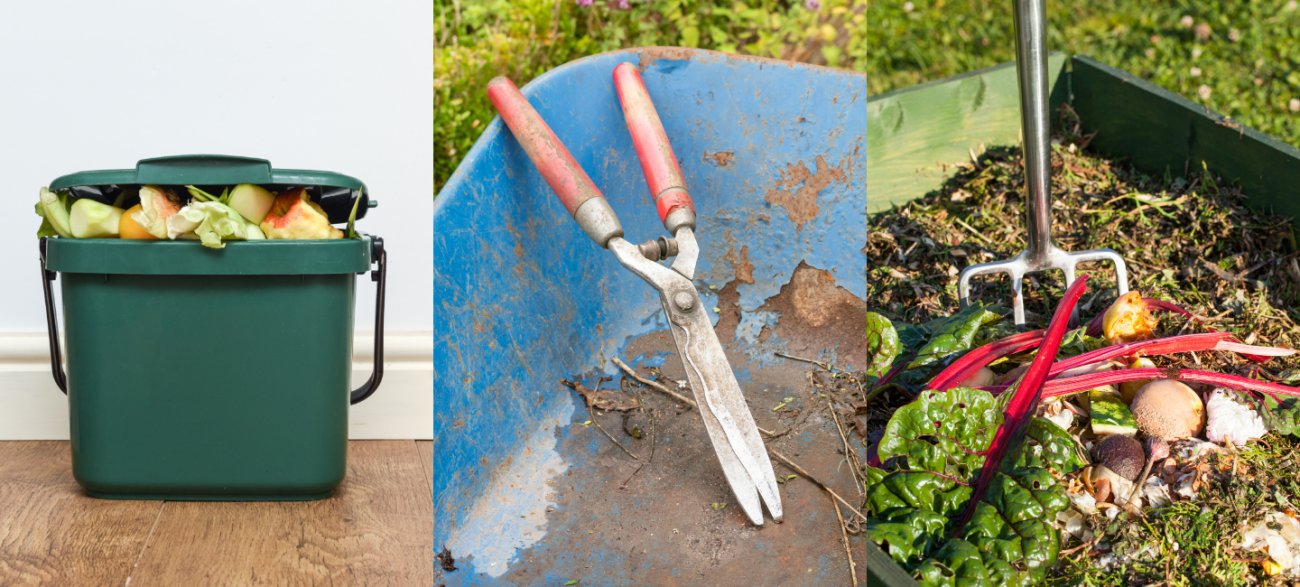
Do I Need Any Tools or Equipment?
Now that you have selected the type of backyard composting system you want and where to place it, itâs time to get composting. While you do not need to go out and buy garden tools, there are some inexpensive hand tools and supplies that can take the âworkâ out of composting:
- A kitchen pail with a tight-fitting lid to collect food scraps in.
- A pair of handheld hedge trimmers or pruners for chopping larger materials.
- A handheld garden fork for burying food scraps.
- A garden hose or watering can to keep the pile moist.
- A pitchfork or for aerating the pile.
- A spade to remove finished compost.
What is the Method for Composting?
There are two main styles or methods for backyard composting. There is the "continuous" style or "cold" method or there is the "batch" style or "hot" method.
The "Continuous" Style (cold)
The continuous style or cold method of composting allows you to dump it as you produce it and then move on with your day, but as with all things convenient, there is a drawback. The decomposition process takes slightly longer, between 3-12 months. Most people who compost at home use the "continuous" style of composting.
If all you do is add waste materials to your compost pile it will take about 12 months to break down, but if you also tend to your pile weekly, by checking on the moisture level and aerating it, you can have finished compost in about 3-4 months using the "continuous" style of composting.
The "Batch" Style (hot)
If you need your compost fast and have a little more time to invest, using the batch style or hot method will yield results in as little as 2-3 months. The batch style takes more time and planning upfront. You make a batch all at once, using stockpiled items such as piles of leaves, plant trimmings, and food scraps. Then, you layer them in the right amounts to get the perfect 2:1 ratio of Carbon to Nitrogen. Monitor the moisture level to prevent drying out, and aerate it weekly, and you will produce compost in as little as 12-weeks.
Reaching volume right from the start almost guarantees the waste material will reach higher temperatures, and decompose faster, hence the name "hot" composting. Most people who use this method soon discover they will need another compost system because they stockpiled more ingredients than will fit in their first system and they cannot add fresh waste materials until the first batch is done.
Things to Avoid Putting in A Backyard Compost Bin
- Meat and dairy products. These take longer to break down, may generate odors (as they do), and may attract the attention of larger critters.
- Yard waste treated with chemicals, such as herbicides or pesticides.
- Weeds that have gone to seed.
- Diseased plants.
- Cat and dog feces.
- Pool water treated with chemicals.
To Speed Things Up
- Throw in a handful of garden soil (not store bought).
- Cut waste materials up between 2" and 6".
- Mix your pile weekly.
- Monitor the moisture level weekly to avoid drying out.
Useful Tips to Backyard Composting
- Empty kitchen pail outside at first sign of fruit flies.
- Bury food scraps under a layer of yard waste to prevent flies. Flies are surface feeders/breeders. If they cannot land on the surface of food they cannot continue their life cycle.
- If you do not have the strength to mix your pile with a pitchfork or aerator, simply poking holes in your pile with a sharp stick, metal pole, or wooden handle of a broom will also introduce more oxygen.
- If your compost system does not have a lid, cover it with a tarp to hold in moisture.
How Do I Know When Compost Is Ready?
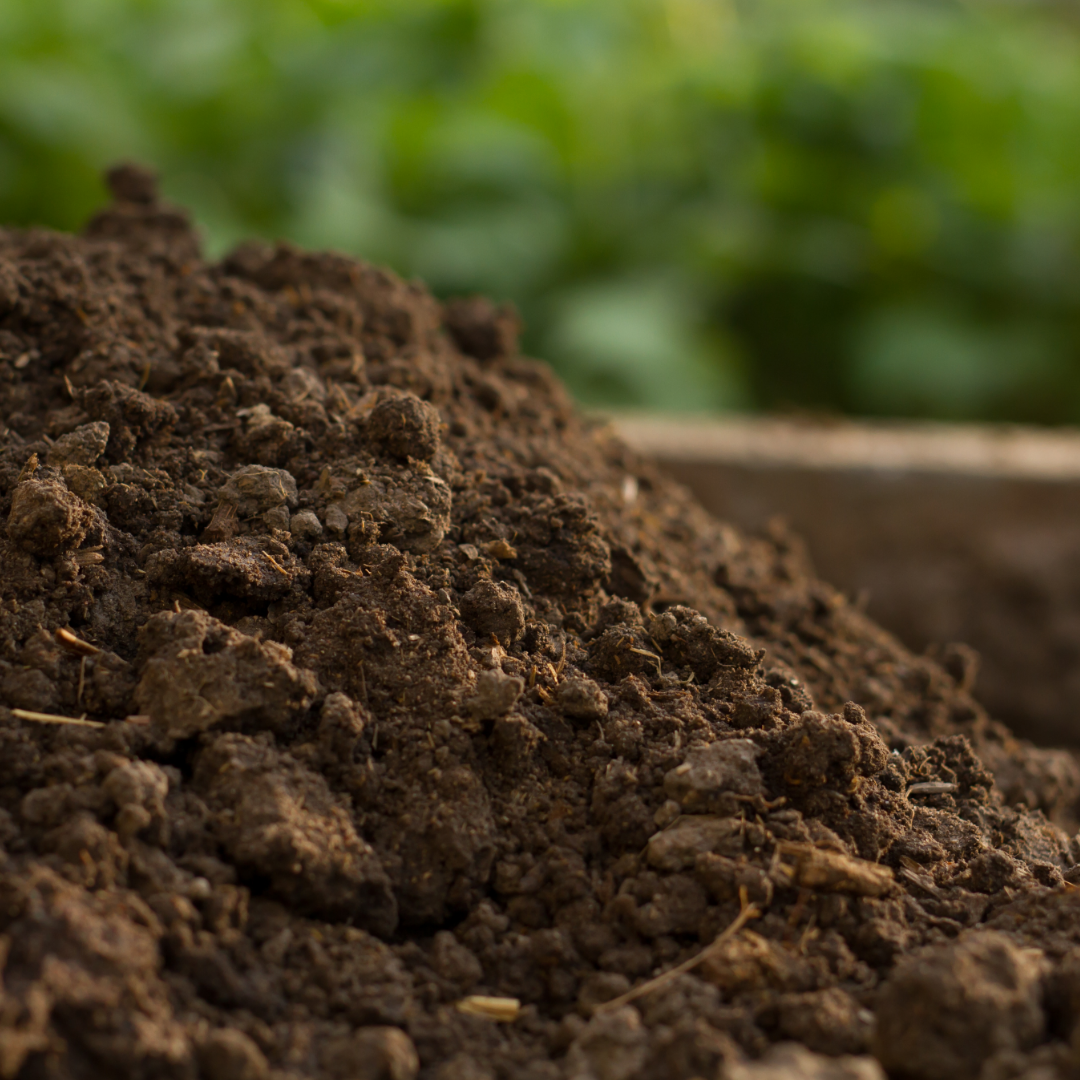
- The waste materials that were added should be completely unrecognizable.
- Finished compost is dark brown-to-black in color.
- A crumbly texture similar to soil.
- Smells earthy like soil, with no malodor.
- Most importantly, it will be ambient temperature, and no heat is coming from it (cured).
Tip: After curing, sift the compost through a screen, with 1/4-inch holes or smaller to remove woody materials that have not yet broken down. If left in finished compost, woody materials will continue to use up nitrogen.
Mix finished compost into garden beds one month before planting. Sprinkle on lawns in spring and fall or add compost as a top dressing around trees and shrubs in spring.